To paint up high without a ladder, you can use an extension pole with a roller or a sprayer for easy reach and coverage. Here is how you can paint high areas without a ladder.
Painting up high can be a challenge, especially when using a ladder. However, there are alternative methods that can make the task easier and safer. One option is to use an extension pole with a roller attachment. This allows you to reach high areas without needing to climb up and down a ladder.
Another option is to use a sprayer, which can cover a larger area in less time. By following these tips, you can paint up high without the need for a ladder and complete your painting project efficiently.

Credit: www.thesun.co.uk
Essential Safety Precautions For Working At Heights
Working at heights can be challenging, especially when it comes to painting without a ladder. However, it is crucial to follow essential safety precautions to ensure a safe working environment.
By utilizing alternative methods like scaffolding or lifts, wearing proper safety equipment, and maintaining secure footing, you can effectively paint up high without compromising your safety.
Importance Of Safety Gear
When it comes to working at heights and painting up high without a ladder, ensuring your safety should be your top priority. Using the appropriate safety gear not only protects you from accidents but also gives you peace of mind to focus on the task at hand.
Safety gear such as hard hats, safety goggles, and dust masks are essential to protect you from falling debris, harmful chemicals, and dust particles that may be present while working at heights.
Proper Footwear For Stability
Wearing proper footwear is crucial when working at heights. It provides you with the necessary stability and support to navigate challenging terrain. Invest in a pair of non-slip, sturdy work boots with good ankle support. These boots should have a thick sole and a strong grip to prevent slips and falls, especially when working on surfaces that may be wet or uneven.
Securing The Work Area
Securing the work area is of utmost importance when it comes to working at heights. Taking the necessary precautions ensures that accidents and mishaps are minimized.
Here are a few steps to help secure your work area:
- Setup Scaffolding or Sturdy Platforms: Avoid precarious positions by opting for scaffolding or sturdy platforms that provide a stable base for you to work on. These alternatives to ladders offer a larger working surface and reduce the risk of falls.
- Secure the Painting Equipment: Make sure that all your painting equipment, including brushes, rollers, and paint cans, are properly secured and within easy reach. This helps in avoiding unnecessary movements and keeps your focus on the painting task.
- Clear the Work Area: Remove any tripping hazards, debris, or obstacles from the work area. This includes power cords, loose objects, and clutter that may pose a safety risk as you move around while painting.
- Use Safety Harnesses and Fall Arrest Systems: In extreme cases where working at considerable heights is necessary, consider using safety harnesses and fall arrest systems. These additional safety measures provide an extra level of protection against falls and can save lives in case of accidents.
By adhering to these essential safety precautions, you can create a safe working environment and confidently paint up high without relying on a ladder. Always prioritize your safety to ensure a successful and accident-free painting experience.
Utilizing Sturdy Alternatives To Ladders
When it comes to painting up high, ladders may not always be the safest or most convenient option. However, several sturdy alternatives can provide a secure platform for your painting projects.
In this section, I will explore three effective alternatives: scaffolding, telescoping ladders, and adjustable work platforms. These options not only prioritize your safety but also ensure convenience and efficiency throughout your painting process.
Scaffolding As A Secure Platform
Scaffolding is a reliable and secure alternative to ladders when it comes to painting up high. It provides a stable platform that allows you to move freely and work comfortably at elevated heights.
With its sturdy structure and wide working area, you can easily maneuver around and tackle large painting projects with utmost stability.
When choosing scaffolding, make sure to opt for one that is specifically designed for painting purposes. Look for options that come with guardrails and non-slip surfaces to enhance safety. Additionally, scaffolding with adjustable heights will give you the flexibility to reach various heights easily.
Using A Telescoping Ladder
If you prefer a more portable option that doesn’t take up much space, a telescoping ladder is an ideal choice. These ladders are designed with adjustable heights that allow you to paint at different levels without the need for additional equipment.
Their compact size makes them easy to transport, making them suitable for both indoor and outdoor painting projects.
When using a telescoping ladder, ensure that it is properly extended and locked in place before climbing it. This will prevent any accidents or mishaps while you are working up high. Additionally, choose a ladder with a wide base and anti-slip feet to provide stability and prevent any wobbling.
Adjustable Work Platforms For Convenience
An adjustable work platform offers another excellent alternative to ladders for painting up high. These platforms provide a spacious and stable surface for you to paint from, allowing you to move around freely and comfortably. With their adjustable heights, you can easily customize the platform to suit your painting needs.
Look for adjustable work platforms that are lightweight yet sturdy. They should have a non-slip surface to prevent any accidents caused by slippery conditions. Additionally, opt for platforms with locking mechanisms to ensure stability and safety throughout your painting project.
Utilizing sturdy alternatives to ladders can significantly enhance your painting experience when working up high. Whether you choose scaffolding, telescoping ladders, or adjustable work platforms, prioritizing safety and convenience is key.
Consider your specific painting needs and the height requirements of your project before selecting the most suitable alternative. By doing so, you can achieve professional results while ensuring your well-being.
Assessing The Project And Gathering Materials
Assessing the project and gathering materials are crucial steps to painting up high without a ladder. By carefully evaluating the task at hand and ensuring you have all the necessary supplies, you can safely and efficiently complete the project.
Determining The Scope Of The Painting Project
Determining the scope of your painting project is the first step to successfully painting up high without a ladder. Start by assessing the area you will be painting and identifying any obstacles that may hinder your reach.
Consider the height of the walls or ceiling, the size of the surface you will be covering, and the type of paint required. This will help you determine whether you need to use special tools or equipment, such as an extension pole or scaffolding. It is important to have a clear understanding of the scope of the project before proceeding to the next steps.
Selecting The Appropriate Paint And Tools
Once you have assessed the project, it is time to select the appropriate paint and tools for the job. Consider the type of surface you will be painting, whether it is interior or exterior, and the desired finish.
If you are painting a high ceiling, for example, you may want to choose a paint specifically designed for ceilings that offer easy application and minimal drips.
Similarly, if you are working on an exterior wall, you will need paint that can withstand harsh weather conditions. Consider the specific requirements of your project and choose the paint and tools accordingly.
Measuring And Calculating The Required Materials
To ensure a smooth painting process, it is essential to measure and calculate the required materials accurately. Start by measuring the surface area you will be painting. This can be done by measuring the length and height of each wall or surface and calculating the total square footage.
If you are unsure how to calculate this, you can find online calculators that will help you determine the amount of paint and other materials needed. Once you have calculated the surface area, consider the paint coverage per gallon specified by the manufacturer.
This will help you determine the number of gallons of paint required for the project. Additionally, take into account any other materials you may need, such as primer, brushes, rollers, drop cloths, or tape. By calculating the required materials accurately, you can avoid unnecessary trips to the store and ensure a smooth and efficient painting process.
To summarize, assessing the project and gathering materials are crucial steps when painting up high without a ladder. Determine the scope of the project, select the appropriate paint and tools, and measure and calculate the necessary materials.
This will lay the foundation for a successful and efficient painting project. Each of these steps is essential to ensure a high-quality result and a hassle-free painting experience. Remember to take your time and prepare adequately before embarking on your painting journey.
Clearing And Organizing The Workspace
Before you embark on painting up high without a ladder, it’s essential to clear and organize your workspace to ensure a seamless and efficient painting process.
By removing obstacles and hazards, covering and protecting furniture and surfaces, and laying out and organizing your tools and materials, you can create a safe and clutter-free environment to maximize your productivity. Let’s dive into each of these steps to get your workspace in tip-top shape for your painting project.
Removing Obstacles And Hazards
To create a safe and clutter-free workspace, the first step is to remove any obstacles and hazards that may impede your painting process. Take a look around the area and identify any items that might get in your way or cause accidents.
This could include furniture, decorations, or loose objects that could fall and cause injury. Clear these items away from the immediate painting area, ensuring a clear path for movement.
Covering And Protecting Furniture And Surfaces
When painting up high, it’s important to protect your furniture and surfaces from paint splatters and drips. Before you begin, cover your furniture with plastic sheets or drop cloths, ensuring that every surface is adequately protected.
Use painter’s tape to secure the covers in place and prevent any accidental slippage or movement during the painting process. By taking this precautionary step, you can preserve the integrity and cleanliness of your furniture and surfaces.
Laying Out And Organizing The Tools And Materials
To maintain an organized and efficient painting process, it’s crucial to lay out and organize your tools and materials beforehand. Gather all the necessary equipment, such as brushes, rollers, paint trays, and paint cans, and place them in a central location within reach.
Utilize a table or workbench to lay out your tools systematically, arranging them based on priority and frequency of use. This way, you can minimize time wasted searching for items and keep your workflow smooth and uninterrupted.
In addition to organizing your tools, consider labeling your paint cans with the corresponding color and type of paint. This will prevent any confusion or mix-ups during the painting process, allowing you to work efficiently and maintain consistency throughout your project.
Now that you have cleared and organized your workspace, you can proceed with confidence to paint up high without a ladder. With your obstacles and hazards removed, your furniture and surfaces protected, and your tools and materials organized, you are ready to embark on your painting project with ease and efficiency.
Using Extended Reach Paint Rollers
When it comes to painting hard-to-reach areas up high, using extended-reach paint rollers can be a game-changer. These specially designed tools can help you achieve a smooth and even paint job without the need for a ladder.
Choosing The Right Extended-Reach Roller
Before you start painting up high, it’s crucial to choose the right extended-reach roller for your project. Here are some factors to consider:
- Adjustable length: Look for a roller that offers adjustable length options, so you can easily reach different heights.
- Quality materials: Opt for a roller made with high-quality materials for durability and longevity.
- Compatibility: Ensure that the roller is compatible with your preferred paint type and roller cover size.
- Handle grip: A comfortable handle grip will allow you to maintain control and minimize fatigue during extended painting sessions.
Proper Technique For Smooth And Even Coverage
To achieve a professional-looking paint job with an extended-reach roller, it’s important to follow some best practices. Here’s how:
- Prepare the surface: Clean the surface thoroughly and make any necessary repairs before starting to paint.
- Load the roller: Dip the roller cover into the paint tray and roll it back and forth to evenly distribute the paint.
- Start from the top: Begin painting at the highest point of your project area and work your way down, applying even pressure on the roller.
- Overlap each stroke: To create a seamless finish, overlap each stroke by around 50% of the roller width, ensuring consistent coverage.
- Smooth out drips: If you notice any drips or uneven spots, gently roll over them with light pressure to smooth them out.
Overcoming Challenges With Corners And Edges
Painting corners and edges can be tricky, even with an extended-reach roller. Here’s how to tackle this challenge:
- Use a smaller roller or a paintbrush: For precise painting in corners and along edges, switch to a smaller roller or use a paintbrush.
- Employ a cutting-in technique: To achieve clean lines, use a cutting-in technique by painting a narrow strip along the edges with a brush before rolling.
- Take your time: When painting corners and edges, patience is key. Slow and steady strokes will yield better results than rushing.
- Inspect and touch up: Once you have completed the main areas, carefully inspect the corners and edges to ensure they are adequately covered. If needed, touch up any missed spots.
Employing Paint Sprayers For High Areas
When it comes to painting high areas without using a ladder, employing paint sprayers can be a game-changer. Not only do paint sprayers provide an efficient and time-saving solution, but they also ensure a smooth and even application.
In this section, I will explore the types of paint sprayers that are best suited for tall surfaces, proper spraying techniques for achieving an even finish, and valuable tips to help you avoid overspray and drips.
Types Of Paint Sprayers Best Suited For Tall Surfaces
When choosing a paint sprayer for painting up high, it is important to consider the type of sprayer that will best suit your needs. Here are the main types:
- Airless Paint Sprayers: These sprayers use a high-pressure pump to atomize the paint, delivering a fine mist. Airless sprayers are ideal for large surface areas and can cover a substantial height, making them a popular choice for painting high exteriors or ceilings.
- HVLP (High Volume Low Pressure) Sprayers: HVLP sprayers incorporate a turbine that generates a high volume of air at low pressure. This technology allows for a more controlled and precise application of paint, making them suitable for detailed work on tall surfaces, such as trim or molding.
Understanding the different paint sprayers available will help you select the one that aligns with your specific painting project and the height you need to reach.
Proper Spraying Techniques For Even Application
Achieving a smooth and even coat of paint on high surfaces requires proper spraying techniques. Here are some tips to help you achieve professional-looking results:
- Hold the sprayer nozzle at a consistent distance from the surface. This distance will depend on the specific sprayer you are using, so be sure to consult the manufacturer’s instructions.
- Maintain consistent, overlapping strokes to ensure even coverage. Start spraying before reaching the surface and release the trigger after moving past the area. This technique helps prevent drips and uneven patches.
- Move the sprayer in a steady and controlled motion, smoothly transitioning from one area to another. Avoid rushing or pausing during the spraying process to maintain a consistent coat.
By applying these spraying techniques, you will be able to achieve a professional finish on high surfaces, creating a visually appealing result.
Tips For Avoiding Overspray And Drips
To prevent overspray and drips when painting up high, keep these valuable tips in mind:
- Use drop cloths or tarps to cover the surrounding area and protect it from any accidental overspray.
- Apply painter’s tape along the surfaces where you want to prevent paint from reaching. This will help create clean lines and avoid any unwanted drips.
- Check and adjust the spray pattern and pressure settings on your paint sprayer before starting to ensure optimal control and minimal overspray.
- Consider using an extension wand or pole attachment to increase your reach and maintain a safer distance from the surface.
By following these tips, you can minimize the risk of overspray and drips, allowing for a more efficient and controlled painting experience.
Brush And Extension Pole Techniques
When it comes to painting up high without a ladder, mastering brush and extension pole techniques is essential. This allows you to efficiently and safely reach those difficult areas, achieving professional results.
In this section, I will explore the key aspects of these techniques, including selecting the appropriate brushes for high areas, attaching and using extension poles effectively, and achieving clean lines and blending strokes.
Selecting The Appropriate Brushes For High Areas
To ensure successful painting in high areas, it is crucial to choose the right brushes. Here are some factors to consider:
- Bristle Type: Opt for synthetic bristle brushes, as they are durable and hold paint well.
- Brush Size: Choose brushes with smaller bristle widths for precise control in tight spaces.
- Angled Brushes: An angled brush is ideal for reaching corners and edges without smudging adjacent areas.
Attaching And Using Extension Poles Effectively
Extension poles are invaluable tools when painting up high. Here’s how you can attach and use them effectively:
- Secure Attachment: Ensure the extension pole is securely attached to the brush handle, using the appropriate mechanism.
- Adjustable Length: Set the extension pole to a comfortable length that allows you to reach the desired height easily, without overextending yourself.
- Proper Grip: Hold the extension pole firmly but comfortably, ensuring good control over the brush as you paint.
Achieving Clean Lines And Blending Strokes
To achieve smooth and professional-looking results, follow these tips for clean lines and blending strokes:
- Tape Off Edges: Use painter’s tape to protect adjacent surfaces and create crisp, clean lines.
- Feather Brush Strokes: Blend the edges of each stroke into the surrounding area, creating a seamless finish.
- Practice Brush Control: With the help of the extension pole, practice steady brush control to maintain control and precision.
By utilizing the right brushes and extension poles, and adopting effective techniques for achieving clean lines and blending strokes, you can tackle high areas with confidence and ease. Implement these skills, and you’ll be able to transform those hard-to-reach spaces with a professional touch.
Mastering The Art Of Cutting In
When it comes to painting up high without a ladder, one of the key techniques to master is cutting in. This skill allows you to create precise edges and seamless transitions, giving your paint job a professional finish.
In this section, I will explore the proper technique for precise edging, share tips for creating seamless transitions, and discuss how to avoid common mistakes to achieve professional results.
Proper Technique For Precise Edging
When it comes to cutting in, a steady hand and the right tools are essential. Follow these steps to ensure clean and precise edges:
- Choose the right paintbrush: Opt for a quality angled brush with fine bristles. This will allow you to have better control and achieve smoother lines.
- Load the brush with paint: Dip the brush about a third of the way into the paint and then tap off any excess on the side of the container. This will help prevent drips and ensure even coverage.
- Start from the corner: Begin at one corner of the wall or surface you are painting, positioning the brush so that the angled tip is against the edge. This creates a solid starting point for your clean edge.
- Use short strokes: Rather than trying to paint the entire edge in one smooth motion, use short strokes. This allows for greater control and helps to avoid accidentally going over the line.
- Keep a wet edge: To avoid visible brush marks, ensure that you maintain a wet edge as you paint. This means slightly overlapping each stroke with the previous one while the paint is still wet.
- Blend with a dry brush: If you notice any brush marks or uneven areas, lightly blend them using a clean, dry brush. This will help create a seamless and professional finish.
Tips For Creating Seamless Transitions
To achieve seamless transitions between different sections or colors, consider the following tips:
- Plan your transitions: Before starting, visualize how the colors will flow together and plan where the transitions should occur. This will help you determine where to start and stop each section.
- Overlap the colors: When transitioning from one color to another, slightly overlap the two sections. This will blend the colors and create a smooth transition.
- Feather the edges: Use a feathering technique by gradually reducing the pressure on the brush as you approach the transition point. This softens the edge and helps the colors blend seamlessly.
- Blend with a dry brush: If needed, use a dry brush to lightly blend the two colors. This will ensure a seamless transition and prevent any noticeable lines.
Avoiding Mistakes And Achieving Professional Results
While cutting in can be challenging, avoiding common mistakes will help you achieve professional results:
- Take your time: Rushing the cutting-in process can lead to sloppy edges and uneven coverage. Take your time and focus on precision.
- Protect adjacent surfaces: Use painter’s tape or a drop cloth to protect adjacent surfaces from accidental paint splatters or drips.
- Inspect and touch up: Once you have finished cutting in, take a step back and inspect the edges. Touch up any areas that need refining to ensure a polished finish.
- Practice: Cutting in takes practice, so don’t be discouraged if you don’t achieve perfect results right away. The more you practice, the better you will become.
Dealing With Common Challenges And Difficult Areas
Painting up high without a ladder can present its own set of challenges. From ceilings and tall walls to uneven surfaces, tricky corners, and tight spaces, each area requires a different approach.
In this section, I will discuss effective strategies for painting ceilings and tall walls, managing uneven surfaces and texture differences, and tackling tricky corners and tight spaces.
Strategies For Painting Ceilings And Tall Walls
When it comes to painting ceilings and tall walls, it’s essential to have the right tools and techniques.
Here are some strategies to make the job easier:
- Choose an extension pole: An extension pole allows you to reach high areas without the need for a ladder. Opt for one with a comfortable grip and an adjustable length to ensure maximum control.
- Use a paint roller with an extended handle: Invest in a paint roller with a long handle or attach an extension pole to your existing roller. This allows you to cover large areas quickly and efficiently.
- Start from the top: Begin by painting the ceiling or the highest point of the wall. This way, any drips or splatters will be covered when you paint the lower sections later.
- Work in small sections: Break down the ceiling or tall wall into manageable sections. By focusing on one area at a time, you can ensure a smooth and consistent finish.
Managing Uneven Surfaces And Texture Differences
Uneven surfaces and texture differences can pose a challenge when painting up high.
Here are some tips to handle them effectively:
- Prepare the surface: Before painting, make sure to prep the surface properly by removing any loose or peeling paint. Fill in any cracks or indentations with a suitable filler.
- Choose the right roller cover: Select a roller cover with a thicker nap for textured surfaces. It will help you achieve better coverage and allow the paint to reach all the crevices.
- Apply multiple thin coats: Instead of applying a single thick coat, apply multiple thin coats of paint. This ensures even coverage and helps minimize noticeable texture differences.
- Blend the edges: When transitioning between different texture types or uneven surfaces, feather the paint’s edges by lightly brushing or rolling over them. This creates a seamless look.
Tackling Tricky Corners And Tight Spaces
Painting in tight corners and narrow spaces requires precision and attention to detail.
Consider the following approaches:
- Use a smaller brush: Utilize a smaller brush, such as an angled sash brush, for painting corners and edges. This allows for greater control and helps achieve a neater finish.
- Mask off adjacent areas: To prevent accidental paint splatters, use painter’s tape to mask off areas adjacent to the tight space you’re working on. This ensures clean lines and protects surrounding surfaces.
- Consider a paint sprayer: If the tight space allows for it, a paint sprayer can provide quick and even coverage. However, ensure proper ventilation and cover nearby items to protect them from overspray.
- Work systematically: Begin painting from the top of the tight corner or space and work downwards. This way, any drips or spills won’t affect already painted areas.
Final Touches And Clean-up
After successfully painting up high without a ladder, it’s time to focus on the final touches and clean-up to put the finishing touches on your project. This step is essential to ensure a flawless paint job that will stand the test of time. Let’s take a look at the key tasks you need to undertake for a professional-looking finish.
Inspecting The Paint Job For Any Flaws Or Touch-ups
Inspecting your paint job is crucial to spot any flaws or areas that need touch-ups. Take a step back and carefully assess the walls and ceiling. Look out for any missed spots, drips, or uneven coverage. In some cases, you may need to apply an additional coat of paint to achieve a seamless finish.
Make sure to pay extra attention to corners, edges, and any intricate details that might require further touch-ups. Using a bright light source or a flashlight can help you identify imperfections more easily. Take your time during this step, as it will greatly contribute to the overall quality of your paint job.
Removing Protective Coverings And Cleaning The Workspace
Once you’re satisfied with the paint job, it’s time to remove any protective coverings you’ve used to shield furniture, flooring, or fixtures from paint splatters.
Carefully peel off the painter’s tape and plastic sheeting, ensuring no leftover residue or adhesive is left behind. A clean removal process will prevent any damage or marks on the surfaces you’ve protected.
After removing the coverings, take the opportunity to clean up your workspace. Use a damp cloth or sponge to wipe down any paint splatters or spills on nearby surfaces.
Good ventilation during the painting process is key to minimizing the need for extensive clean-up, but it’s always a good idea to do a thorough check and tidy any stray marks before considering the job done.
Proper Storage And Care For Paintbrushes And Other Tools
Now that the painting is complete, it’s essential to properly store and care for your paintbrushes and other tools. Neglecting this step can result in damaged or unusable brushes for future projects. Take the following steps to ensure the longevity and optimal performance of your tools:
- Rinse the brushes thoroughly with warm water until the water runs clear, removing all traces of paint.
- Use mild soap or brush cleaner to gently cleanse the bristles, ensuring all remaining paint is removed.
- Dry the brushes completely by gently squeezing out excess water and reshaping the bristles.
- Store the brushes in a clean, dry area, away from direct sunlight or extreme temperatures.
- If using any other tools, such as rollers or paint trays, make sure to clean them according to the manufacturer’s instructions and properly store them.
By following these proper storage and care practices, you’ll be ready to tackle your next painting project with tools that are in excellent condition.
Frequently Asked Questions Of How To Paint Up High Without A Ladder
How Do You Paint High Hard To Reach Places?
Painting high hard to hard-to-reach places requires proper safety precautions and the right tools. Use an extension pole or ladder to reach the area. Make sure to protect the surrounding area and wear appropriate safety gear. Plan your approach, start from the top, and work your way down for better results.
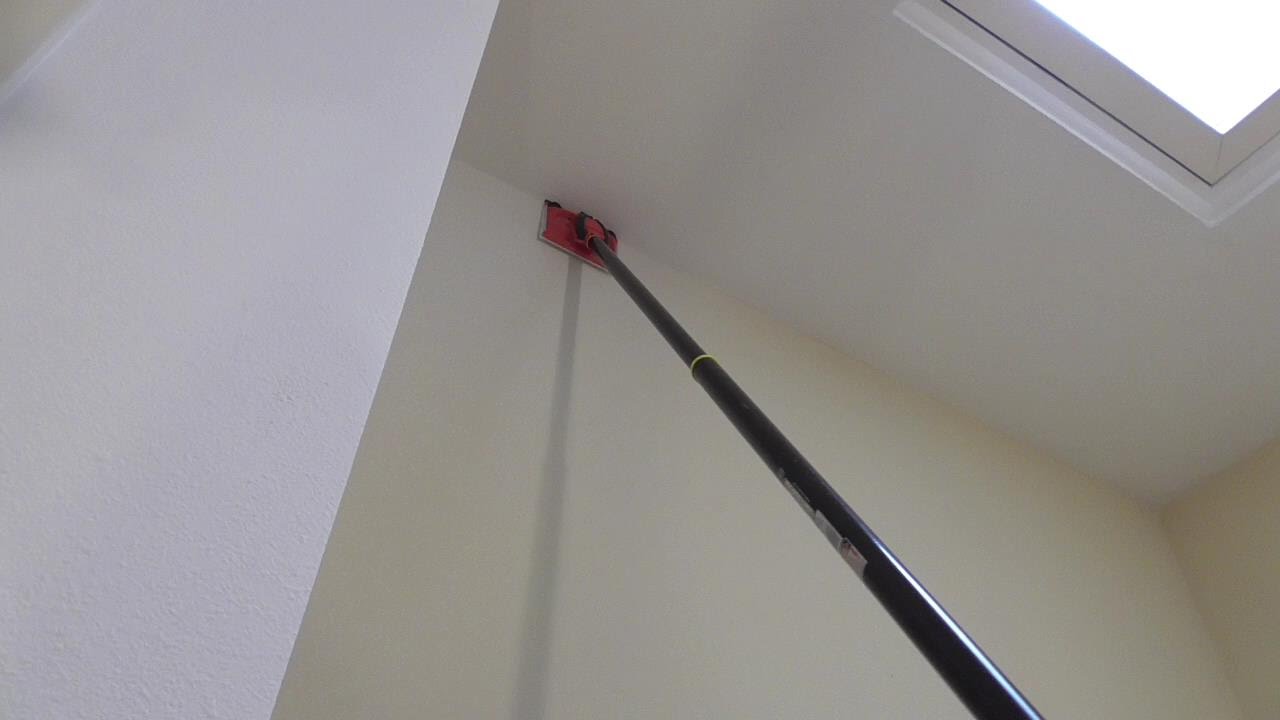
How Do You Paint A High Stairwell Without A Ladder?
To paint a high stairwell without a ladder, you can use an extension pole with a paint roller attached. This allows you to reach high areas and paint efficiently. Make sure to prep the area, use drop cloths, and take safety precautions when working at heights.
How Can I Paint My House Without A Ladder?
To paint your house without a ladder, consider using an extendable paint roller or a long-handled paintbrush. These tools allow you to reach high areas from the ground. Alternatively, you can rent a scaffolding or platform lift to safely reach elevated parts of the house.
Ensure you follow proper safety precautions and use stable footing when painting at heights.
What Do Painters Use To Get Up High?
Painters use ladders, scaffolding, and aerial lifts to reach high areas. These tools allow them to work safely and efficiently.
How Can I Safely Paint High Areas Without Using A Ladder?
To safely paint high areas without a ladder, you can use an extension pole or a telescopic paint roller.
What Are Some Alternatives To Using A Ladder When Painting High Walls?
Alternatives to using a ladder when painting high walls include using a scaffolding system, a scissor lift, or hiring a professional painter with elevated work platforms.
Is It Possible To Paint The Ceiling Without Using A Ladder?
Yes, it is possible to paint the ceiling without using a ladder by using an extension pole with a roller attached at the end.
Final Words
To conclude, painting up high without a ladder is not only possible but also a safer and more efficient approach. By utilizing tools such as extended-reach paint rollers, adjustable painting poles, or scaffolding, you can easily tackle high walls and ceilings without risking your safety.
Remember to take necessary precautions and plan your painting project for optimal results. So, say goodbye to ladders and embrace these alternatives to elevate your painting game. Happy painting!