
To make an attic ladder insulation box, cut and assemble a wooden frame using exterior-grade plywood and reinforce it with corner brackets. Then, insulate the box using foam board insulation and fit it tightly around the attic ladder opening, sealing any gaps with weatherstripping.
Finally, cover the insulation with a vapor barrier and secure the box in place with screws or adhesive. Creating an efficient and well-insulated attic space is essential for maintaining a comfortable home and reducing energy costs. One often overlooked area is the attic ladder opening, which can allow drafts and heat loss.
To address this issue, constructing an attic ladder insulation box can be a simple and effective solution. By following a few straightforward steps, you can create airtight insulation that will help to keep your home properly insulated and improve energy efficiency.
I will outline the process of making an attic ladder insulation box, providing you with the necessary guidance to complete this project successfully.
Materials And Tools
In order to create an effective attic ladder insulation box, you will need to gather a few important materials and tools. These items will help you construct a durable and well-insulated box that will keep your home energy efficient. Here is a list of necessary materials for the project:
List Of Necessary Materials For The Project:
- Rigid foam insulation boards: These boards are an essential component of your insulation box, as they provide excellent insulation properties to prevent heat loss.
- Plywood sheets: You will need plywood sheets to construct the primary structure of the insulation box. It is recommended to use sturdy plywood for durability and stability.
- Adhesive: A strong adhesive will be necessary to secure the rigid foam insulation boards to the plywood sheets. Make sure to choose an adhesive that is suitable for both materials.
- Screws: Screws are vital for reinforcing the joints and connecting the plywood sheets. Opt for screws that are suitable for plywood and ensure a strong bond.
- Tape measure: A tape measure is essential for taking accurate measurements of your attic ladder opening. This will help you create an insulation box that fits perfectly.
- Circular saw: You will need a circular saw to cut the plywood sheets and rigid foam insulation boards to the required dimensions. Ensure the blade is suitable for cutting these materials.
- Drill: A drill will be necessary for creating pilot holes and driving screws into the plywood sheets. Choose a drill with the appropriate power and drill bits.
- Screwdriver: A screwdriver will help you tighten screws securely in place. It is important to have one with a comfortable grip for ease of use.
- Safety equipment (gloves, goggles): Safety should be a priority during any DIY project. Wear protective gloves and goggles to prevent any potential injuries.
By gathering these materials and tools, you can proceed with confidence to construct your attic ladder insulation box. The specific assembly steps will vary depending on the design and dimensions of your attic ladder. However, having the right materials and tools will make the construction process much smoother and more efficient.
Building An Attic Ladder Insulation Box
An attic ladder insulation box is a great addition to your home as it helps prevent energy loss and keeps your living spaces comfortable. By creating a barrier around your attic ladder opening, you can effectively reduce drafts and heat loss during the colder months.
In this guide, I will take you through the step-by-step process of building an attic ladder insulation box to help you achieve a more energy-efficient home. Let’s get started!
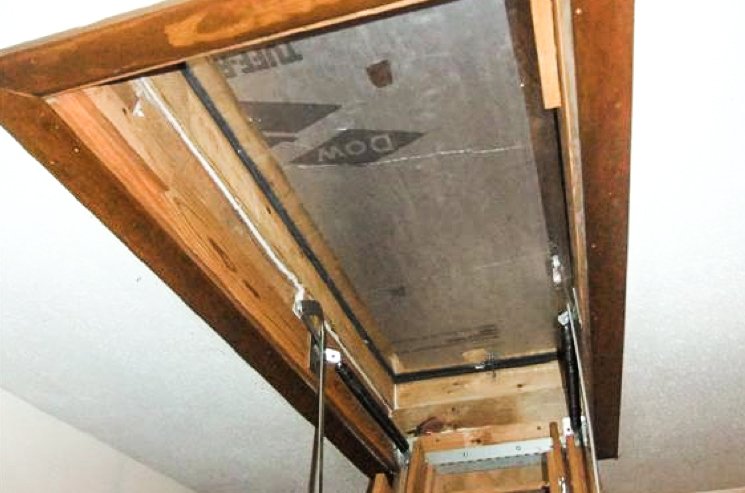
Step 1: Measuring The Attic Ladder Opening
The first step in building an attic ladder insulation box is to accurately measure the opening of your attic ladder. This will ensure that the box fits securely and effectively seals off the opening. Grab a measuring tape and follow these instructions:
- Measure the width of the attic ladder opening from wall to wall.
- Measure the height of the opening from the floor to the top of the ladder opening.
- Write down your measurements and keep them handy for the next steps.
Step 2: Cutting The Plywood Sheets And Foam Insulation Boards
Now that you have your measurements, it’s time to cut the plywood sheets and foam insulation boards to the appropriate dimensions. You will need the following materials:
- 4 pieces of plywood for the sides of the insulation box
- 1 piece of plywood for the top of the insulation box
- 4 pieces of foam insulation board for additional insulation
Using a saw or a utility knife, follow these instructions to cut the materials:
| Material | Dimension |
|---|---|
| Plywood for sides | Width: Attic ladder opening width; Height: Attic ladder opening height |
| Plywood for top | Width: Attic ladder opening width + 2 inches; Height: Attic ladder opening height + 2 inches |
| Foam insulation board | Same dimensions as plywood for sides |
Step 3: Assembling The Insulation Box
Now that you have all the materials cut to the appropriate dimensions, it’s time to assemble the insulation box. Follow these steps:
- Take one piece of plywood for the sides and attach it to another piece of plywood, forming an L-shape.
- Repeat the previous step with the remaining plywood pieces to create a rectangular box.
- Secure the corners of the box with screws or nails for added stability.
- Place the foam insulation boards inside the box, ensuring they fit snugly.
- Attach the plywood for the top, using screws or nails, to close the box securely.
Step 4: Securing The Insulation Box To The Attic Ladder Opening
With the insulation box assembled, it’s time to secure it to the attic ladder opening. Depending on your preference and the design of your attic ladder, you can choose one of the following methods:
- Attach hinges to the plywood top of the box and the attic ladder opening, allowing easy access.
- Use removable screws or hooks to secure the insulation box to the ladder opening.
- For a more permanent solution, screw the insulation box directly to the attic ladder opening framework.
Step 5: Sealing Any Gaps Or Air Leaks
Lastly, it’s essential to seal any gaps or air leaks around the insulation box to ensure maximum efficiency. Use high-quality weatherstripping or foam tape to cover any openings around the box. This will create a tight seal, minimizing air leakage and energy loss.
Additional Tips And Considerations
Learn how to create an attic ladder insulation box with these additional tips and considerations. Discover the best techniques to efficiently insulate your attic ladder for improved energy efficiency.
When it comes to insulating your attic ladder, there are a few additional tips and considerations that can ensure optimal performance. Proper insulation box maintenance and cleaning is crucial to prolong the lifespan of your ladder and maintain its effectiveness. Additionally, safety precautions while working with tools and materials are essential to ensure a smooth and accident-free insulation box installation process.
Insulation Box Maintenance And Cleaning
Maintaining and cleaning your attic ladder insulation box is an important step in keeping it in pristine condition and maximizing its insulation capabilities. Regular maintenance helps prevent damage, mold growth and reduces air leakage. Here are some maintenance tips:
- Inspect for any wear and tear: Regularly check the insulation box for any signs of damage, such as cracks, gaps, or loose seals. If you notice any issues, address them promptly to prevent air leakage.
- Clean the insulation box: Over time, dust, dirt, and debris can accumulate in the insulation box, reducing its efficiency. Use a vacuum cleaner or a soft brush to remove any particles and keep the box clean.
- Replace damaged insulation: If you notice any damaged or compressed insulation material, it’s crucial to replace it promptly. This ensures there are no gaps or weak spots in the box’s insulation, maintaining optimal energy efficiency.
Safety Precautions While Working With Tools And Materials
Working with tools and materials can pose risks if proper safety precautions are not followed. Protecting yourself and your surroundings is paramount to a successful insulation box installation. Consider the following safety measures:
- Wear protective gear: Before beginning any work, ensure you are wearing appropriate protective gear, including safety goggles, gloves, and a dust mask. This will safeguard you from potential injuries and inhaling harmful particles.
- Use tools correctly: Familiarize yourself with the proper usage of the tools required for the installation process. Follow the manufacturer’s instructions and exercise caution while handling them to prevent accidents.
- Secure the ladder: Before working on the insulation box, ensure that your attic ladder is securely positioned and stable. This helps prevent any accidents or falls while installing or maintaining the insulation box.
- Work in a well-ventilated area: To avoid inhaling fumes from adhesives or dust particles, work in a properly ventilated area or use proper respiratory protection if necessary.
By adhering to these additional tips and considerations, you can maintain your attic ladder insulation box effectively and ensure your safety during the installation process. Regular maintenance and proper safety precautions will ensure that your insulation box continues to provide optimal insulation, keeping your home comfortable and energy-efficient.
Credit: www.energy.gov
Frequently Asked Questions On How To Make An Attic Ladder Insulation Box
How Do You Insulate An Attic Ladder Opening?
To insulate an attic ladder opening, follow these steps: 1. Measure the dimensions of the opening. 2. Cut rigid foam insulation panels to fit the measured dimensions. 3. Attach the foam panels to the attic side of the opening using adhesive or screws.
4. Seal any gaps or cracks with caulk or foam sealant. 5. Install weatherstripping around the perimeter of the opening to provide a tight seal.
Can You Insulate An Attic Ladder?
Yes, you can insulate an attic ladder to improve energy efficiency and prevent air leakage. Insulating the ladder helps to maintain a consistent temperature in your home and reduces heat or cool air loss.
How To Build An Attic Door Insulation?
To build attic door insulation, follow these steps:
- 1. Measure the dimensions of your attic door.
- 2. Purchase insulation materials like foam board or weatherstripping.
- 3. Cut the insulation to fit the door and attach it securely.
- 4. Seal any gaps or cracks around the door with caulk or spray foam.
- 5. Finally, check for proper insulation and adjust if necessary.
How Do You Make An Insulated Attic Hatch?
To make an insulated attic hatch, follow these steps:
- 1. Measure the dimensions of the attic opening.
- 2. Cut a piece of foam board insulation to fit the dimensions.
- 3. Attach weatherstripping around the edges of the foam board.
- 4. Install hinges on one side of the foam board and attach it to the attic opening.
- 5. Apply adhesive to secure the insulation in place.
How Can An Attic Ladder Insulation Box Help In Energy Efficiency?
An attic ladder insulation box prevents air leakage, improves insulation, and reduces energy consumption in your home.
What Materials Are Needed To Make An Attic Ladder Insulation Box?
To make an attic ladder insulation box, you will need plywood, insulation material, caulk, screws, and a measuring tape.
How Do I Measure For The Correct Size Of The Attic Ladder Insulation Box?
Measure the width, length, and height of the attic ladder opening to ensure a snug fit for your insulation box.
Final Words
Properly insulating your attic ladder is essential for energy efficiency and preventing air leakage. By following the steps outlined in this blog post, you can easily create an attic ladder insulation box. This DIY project will help keep your home comfortable and reduce energy costs.
Remember to use suitable materials and take accurate measurements for the best results. With a well-insulated attic ladder, you can enjoy a more comfortable home all year round. Start saving on your energy bills today!