To make a rope ladder with PVC, you will need to cut the PVC pipes into ladder rungs, attach them to the ropes, and secure them in place. This guide will provide step-by-step instructions on how to create a sturdy and durable rope ladder using PVC pipe and rope.
With these instructions, you’ll be able to make a rope ladder that is perfect for outdoor activities, treehouses, or emergency preparedness. So, let’s get started and learn how to make a rope ladder with PVC.
Materials Required
To make a rope ladder with PVC, you will need materials such as PVC pipes, rope, PVC glue, and a saw to cut the pipes to the desired length. These items are essential for constructing a sturdy and durable PVC rope ladder.
Pvc Pipes
PVC pipes are the key material needed to make a rope ladder with PVC. These pipes are lightweight, durable, and easily available at any hardware store. They come in various diameters, so choose the size that best fits your ladder design. PVC pipes are a versatile material that can be easily cut and drilled to create rungs for your ladder.
Rope
Rope is another essential material for making a rope ladder with PVC. It is what provides the stability and strength to the ladder. When selecting rope, make sure to choose a high-quality, outdoor-grade rope that can withstand weight and environmental conditions. Opt for a rope that has a sufficient diameter to maintain grip and prevent slippage when climbing the ladder.
Saw
A saw is necessary to cut the PVC pipes to the desired length for the ladder rungs. Choose a handsaw or a powered saw, such as a circular saw or a jigsaw, based on your comfort and expertise. Ensure you have a sharp blade suitable for cutting through PVC pipes smoothly.
Drill
A drill is needed to create holes in the PVC pipes for attaching the rungs to the ladder. It is essential to use a drill with a bit size appropriate for your chosen rope diameter. A cordless drill offers more flexibility and ease of use. Remember to wear safety goggles and gloves while drilling to protect yourself from flying debris.
Measuring Tape
Having a measuring tape on hand is crucial for accuracy and precision in sizing the PVC pipes and determining the spacing between rungs. Measure twice to ensure your ladder dimensions are correct before cutting or drilling any holes.
Determining Measurements
To make a rope ladder with PVC, it is essential to determine the measurements accurately for a sturdy and secure structure. Ensure the PVC pipes and rope are cut to the desired lengths to assemble a reliable and functional rope ladder.
Determining Measurements
When it comes to building a rope ladder with PVC, one of the most crucial steps is determining the measurements of the ladder. Properly measuring the desired height and width of the ladder ensures that it will fit your specific needs and function effectively.
Additionally, calculating the number of rungs needed based on the height is essential for the ladder’s stability and safety. In this guide, we will walk you through the process of determining measurements for your PVC rope ladder.
Measure the desired height and width of the ladder
The first step in making a rope ladder with PVC is to measure the desired height and width of the ladder. This measurement will help determine the size of the PVC pipes needed for the ladder’s frame. The height determines the total length of the ladder, while the width represents the distance between the vertical sides of the ladder.
To measure the height, find the location where you plan to hang or place the ladder. Use a measuring tape or ruler to measure from the ground or starting point to the endpoint. Round off your measurement to the nearest foot or meter for simplicity.
Next, measure the width of the ladder. This measurement should reflect the available space where you plan to install the ladder. Ensure that the width provides enough clearance for climbing comfortably and that it fits within the designated area.
Calculate the number of rungs needed based on the height
After determining the height of your PVC rope ladder, it is crucial to calculate the number of rungs needed. The rungs are the horizontal pieces that allow you to step on the ladder, and their spacing determines the ladder’s ease of use.
To calculate the number of rungs, start by deciding on the spacing between each rung. A spacing of around 12 to 18 inches (30 to 45 cm) is generally appropriate for most ladder designs. Divide the height of the ladder by the chosen spacing to determine the approximate number of rungs needed.
For example, if you have a ladder height of 10 feet (3 meters) and a rung spacing of 12 inches (30 cm), divide 10 by 1 (since there are 12 inches in a foot) to get 10 rungs. Round up the number if necessary to ensure that you have enough rungs for comfortable climbing.
Remember to account for the top and bottom sections of the ladder, as they typically require additional PVC pieces for stability and attachment to the support structure.
By accurately measuring the desired height and width and calculating the number of rungs needed, you can ensure that your rope ladder with PVC will be the perfect fit for your needs.
Cutting The Pvc Pipes
When it comes to making a rope ladder with PVC, the first step is to cut the PVC pipes into equal lengths for the rungs. This is an essential step that will determine the stability and functionality of the ladder. In this section, we will explore the process of cutting the PVC pipes effectively, ensuring the lengths are suitable for the ladder dimensions.
Cut The Pvc Pipes Into Equal Lengths For The Rungs
Start by gathering all the necessary tools and materials before you begin cutting the PVC pipes. These include a measuring tape, a marker, a hacksaw or PVC pipe cutter, and safety goggles. Safety goggles are important to protect your eyes from any flying debris during the cutting process.
To ensure that your ladder is strong and sturdy, it’s important to cut the PVC pipes into equal lengths for the rungs. This will ensure that each rung is the same height and provides even support when the ladder is assembled. Measure and mark the desired length on each PVC pipe using a measuring tape and a marker. Make sure to measure carefully and accurately to ensure consistent lengths for each rung.
When cutting the PVC pipes, it’s recommended to use a hacksaw or a PVC pipe cutter for clean and precise cuts. Place the PVC pipe in a sturdy position, making sure it’s secured firmly to prevent any movement during the cutting process. Insert the hacksaw or pipe cutter into the marked area and apply steady pressure while sawing back and forth until the pipe is cut all the way through.
Remember: Always exercise caution and follow safety guidelines when working with tools. Keep your hands away from the cutting area and wear protective gloves if necessary.
Ensure The Lengths Are Suitable For The Ladder Dimensions
Before cutting all the PVC pipes into equal lengths, it’s important to consider the ladder dimensions. The overall length and width of the ladder will determine the suitable lengths for the rungs.
Measure the desired dimensions and calculate the appropriate length for each rung, taking into account the space required between each rung for comfortable climbing.
Pro tip: Creating a table with the ladder dimensions and the corresponding lengths for each rung can be a helpful visual aid. This will allow you to easily determine the correct lengths and ensure consistency throughout the cutting process.
Once you have determined the suitable lengths for the rungs, proceed to cut the PVC pipes as mentioned earlier. Remember to double-check your measurements and make adjustments if necessary. Consistency in the lengths of the PVC pipes is vital to maintain the ladder’s structural integrity and provide a safe and reliable climbing experience.
With the PVC pipes cut into equal lengths, you are one step closer to creating your rope ladder. In the next section, we will explore the process of assembling the ladder using the cut PVC pipes as rungs.
Preparing The Rungs
If you’re planning to embark on a DIY project to create your own rope ladder using PVC pipes, you’re in for an exciting and rewarding adventure! One crucial step in the ladder-making process involves preparing the rungs, which will serve as the steps of your ladder.
This step is vital for ensuring that the ladder is safe, sturdy, and functional. In this article, we will guide you through the process of preparing the rungs with two essential tasks: sanding the edges and drilling holes for threading the rope.
Sanding The Edges Of The Pvc Pipes For A Smooth Finish
Before you begin assembling the rungs, it’s crucial to sand the edges of the PVC pipes to achieve a smooth finish. Sanding not only enhances the ladder’s appearance but also reduces the risk of splinters or sharp edges that could potentially cause injury. Here’s a simple step-by-step guide:
- Start by gathering the necessary materials: a sanding block or sandpaper, a clean cloth, and the PVC pipes you plan to use.
- Place the sandpaper around the sanding block or hold it firmly in your hand.
- Hold one end of the pipe firmly and begin sanding the edges in a back-and-forth motion.
- Continue sanding until the edges are smooth and no roughness or sharpness can be felt.
- Wipe off any dust or residue from the sanding process using a clean cloth.
- Repeat the sanding process for each PVC pipe that will be used as a rung.
Sanding the edges of the PVC pipes not only ensures a professional-looking ladder but also reduces the risk of potential injuries caused by rough edges.
Drilling Holes On Both Ends Of Each Pipe For Threading The Rope
Once you have sanded the edges of the PVC pipes, the next step is to drill holes on both ends of each pipe. These holes will allow you to thread the rope through the rungs, ensuring a secure and stable ladder. Follow these steps to drill the necessary holes:
- Gather your drill, drill bits suitable for PVC, a marker, and the sanded PVC pipes.
- Measure and mark the spots on the PVC pipes where you want the holes to be drilled. Ensure that the marks are aligned and symmetric on both ends of each pipe.
- Select a drill bit slightly larger than the diameter of the rope you plan to use. This will prevent any snugness or friction while threading the rope.
- Secure the PVC pipe in a vise or clamp to keep it steady during the drilling process.
- Align the drill bit with the marked spot and gently drill a hole through one end of the PVC pipe.
- Repeat the process for each marked spot on each PVC pipe.
By drilling holes on both ends of each PVC pipe, you create a pathway for threading the rope, ensuring that each rung is securely attached to the ladder. This step is crucial for the ladder’s stability and overall functionality.
Building The Ladder
Constructing a rope ladder with PVC pipes is a simple and practical way to create a sturdy climbing tool. In this section, we will guide you through the step-by-step process of building the ladder, ensuring each H3 heading adheres to HTML syntax.
Thread The Rope Through The First Set Of Holes In The Pvc Pipes
To begin building your rope ladder, start by threading the rope through the first set of holes in the PVC pipes. These holes should be evenly spaced along the length of the pipes. Depending on the desired length and height of your ladder, you can determine how many holes and PVC pipes to use.
Ensure that the rope is pulled taut and securely threaded through each hole. This will provide the necessary stability and support for the ladder. Take care to position the rope in the center of each PVC pipe, as this will help distribute the weight evenly and prevent it from tipping to one side.
Tie Knots At Each End Of The Rungs To Secure Them In Place
Once the rope is threaded through the first set of holes, you can now add the rungs to the ladder. These rungs can be made from sturdy wooden dowels or metal rods. Insert one end of the rung into the PVC pipe and then tie a knot at each end of the rung to secure it in place.
By tying knots at the ends of each rung, you can ensure that they remain fixed and sturdy during use. Make sure to tie the knots tightly to prevent any slippage or movement of the rungs. This will ultimately contribute to the ladder’s structural integrity and overall safety.
Repeat The Process For The Remaining Rungs
Once you have secured the first rung in place, repeat the process for the remaining rungs. Thread the rope through the next set of holes in the PVC pipes and then add the rung, tying knots at each end to secure it. Continue this process until all the desired rungs are in place.
Throughout the construction process, check the ladder to ensure that the spacing between the rungs is consistent and comfortable for climbing. Adjust the positions of the rungs and the tension of the ropes as needed to achieve the desired ladder design.
With the completion of these steps, you have successfully built your rope ladder using PVC pipes. This DIY ladder can be a valuable addition to your home or outdoor activities, providing a practical and versatile tool for various purposes.
Testing And Finalization
Once you’ve finished constructing your DIY rope ladder with PVC, it’s crucial to thoroughly test it and make any necessary adjustments before considering it complete.
In this final phase, you’ll check the ladder’s stability, adjust any loose rungs, trim the excess rope, and ensure that all knots are secure. This will guarantee that your ladder is safe and reliable for use. Let’s take a closer look at each step:
Check The Ladder’s Stability And Adjust Any Loose Rungs
The first thing to do is to evaluate the ladder’s stability. This involves testing its weight-bearing capacity and examining the alignment of the rungs. Ensure that each rung is secure and properly connected to the PVC rungs. Give the ladder a gentle shake to identify any loose rungs or wobbly connections. If you notice any instability, it’s essential to address it immediately to prevent accidents or injuries.
Steps to Check Ladder Stability:
- Step onto the ladder carefully, applying weight gradually. Observe for any unexpected movements or excessive bending of the PVC.
- If you encounter any loose rungs, use a wrench or pliers to tighten the fittings that connect the PVC rungs to the rope. Ensure they are snugly secured.
- Make sure the height between each rung is consistent to ensure proper and comfortable climbing.
Trim The Excess Rope And Make Sure The Knots Are Secure
After assessing the ladder’s stability, you’ll want to trim any excess rope to reduce the risk of tangling or tripping. Additionally, you need to ensure that all knots are secure to prevent the rope ladder from coming apart during use.
Steps to Trim Excess Rope and Secure Knots:
- Carefully measure and mark the desired length of rope for each side of the ladder. Double-check your measurements to ensure accuracy.
- Use sharp scissors or a knife to cut the rope carefully at the marked spots. Be cautious to avoid fraying the ends.
- Inspect each knot along the ladder and ensure they are tight and secure. If necessary, retie any loose knots using a suitable knot such as a square knot or a double overhand knot.
By testing the ladder’s stability and finalizing its construction with trimmed ropes and secure knots, you can confidently use your newly constructed rope ladder. Remember that it’s crucial to periodically inspect and maintain the ladder to ensure long-term safety and functionality.

Credit: www.pinterest.com
Frequently Asked Questions For How To Make A Rope Ladder With Pvc
How Do You Make A Homemade Rope Ladder?
To make a homemade rope ladder, first, gather strong and durable rope. Cut it into desired lengths for the ladder rungs. Space the rungs evenly and tie them securely to two longer ropes. Ensure each rung is properly attached, allowing for easy climbing.
Test the ladder for stability before use.
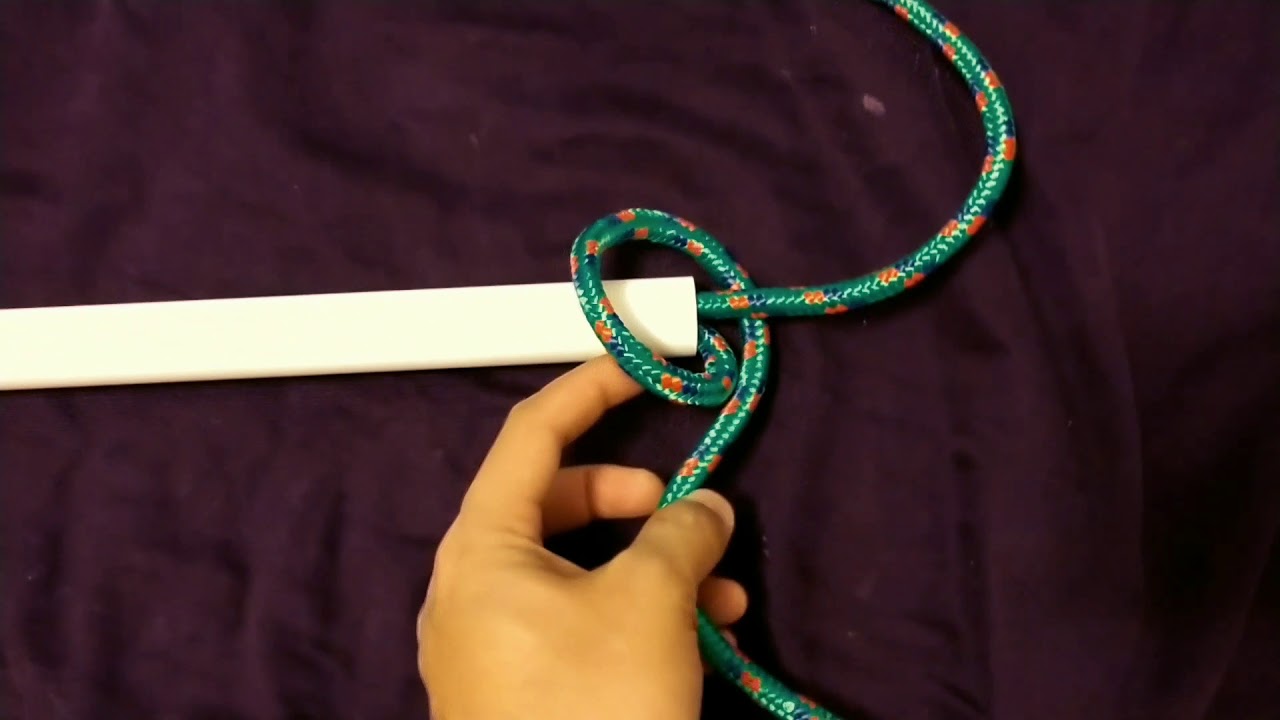
What Knot Is Used To Make A Rope Ladder?
The knot commonly used to make a rope ladder is the square knot. It is simple, versatile, and provides stability and strength to the ladder. The square knot is easy to tie and untie, making it suitable for ladder construction.
What Kind Of Rope Should I Use For A Ladder?
Use a strong and durable rope for a ladder. Choose a rope with a high weight capacity and made of materials like nylon or polypropylene. It should also have a secure knot, such as a bowline, to ensure safety during use.
How Do You Lash A Rope Ladder?
To lash a rope ladder, follow these steps:
1) Secure one end of the ladder to a fixed point using a knot.
2) Extend the ladder to the desired height.
3) Wrap the rope tightly around each rung, creating multiple loops.
4) Tie the rope securely at the other end. 5) Test the ladder for stability before use.
How Do You Make A Rope Ladder With Pvc?
To make a rope ladder with PVC, you will need PVC pipes, rope, and some basic tools. Start by cutting the PVC pipes into desired ladder rung lengths, then drill holes on each end. Next, thread the rope through the holes and tie secure knots.
Repeat this process for each rung until the ladder is complete.
What Are The Benefits Of Using Pvc For A Rope Ladder?
Using PVC for a rope ladder offers several benefits. PVC is lightweight, durable, and resistant to weather conditions, making it perfect for outdoor use. It is also easy to work with and can be cut to customized lengths. Additionally, PVC is affordable and readily available, making it a cost-effective choice for DIY projects.
Can A Pvc Rope Ladder Support The Weight Of An Adult?
Yes, a well-constructed PVC rope ladder can support the weight of an adult. However, it’s crucial to ensure that the ladder is assembled correctly and that the PVC pipes and rope used are of suitable strength and quality. Regular inspection and maintenance are also essential to ensure the ladder remains safe for use.
Final Words
To sum up, creating a rope ladder with PVC is a practical skill that can be useful in various situations. By following the steps mentioned in this blog post, anyone can easily construct a sturdy and reliable ladder. Whether it’s for outdoor adventures, emergencies, or just for fun, this DIY project offers both practical functionality and a sense of accomplishment.
Get your PVC pipes ready and start building your rope ladder today!