To install an attic ladder by yourself, first, measure the opening in your ceiling, ensuring it’s large enough for the ladder. Then, follow the manufacturer’s instructions to assemble and install the ladder securely.
Preparing For Installation
Installing an attic ladder can be a great way to add convenience and accessibility to your attic space. However, before you dive into the installation process, it’s important to properly prepare.
This includes taking accurate measurements, choosing the right ladder type, gathering necessary tools and materials, and prioritizing safety precautions. In this section, we will guide you through each step in detail to ensure a successful DIY installation.
Measure Your Attic Access Point
Measuring your attic access point is the first crucial step towards installing an attic ladder. By accurately measuring the dimensions of your access point, you can determine the ladder size that will fit perfectly.
To do this, follow these simple steps:
- Clear any obstructions around the access point to ensure accurate measurements.
- Using a tape measure, measure the distance between the floor and the highest point of the access opening. This will help you determine the ladder’s length.
- Measure the width of the access opening to determine the ladder’s width.
Choose The Right Ladder Type For Your Attic
Once you have accurate measurements, it’s time to choose the right ladder type for your attic. There are various types available, such as folding, telescoping, and sliding ladders.
Consider factors like space availability, frequency of use, and personal preference when making your decision. To help you make an informed choice, here are the main ladder types:
| Ladder Type | Pros | Cons |
|---|---|---|
| Folding Ladder | Easy to install and operate, space-saving | Slightly more expensive, limited weight capacity |
| Telescoping Ladder | Compact design, adjustable length | Less weight capacity, may require more effort to open and close |
| Sliding Ladder | Smooth operation, high weight capacity | Requires more space, can be challenging to install |
Gather The Necessary Tools And Materials
Before starting the installation process, it’s important to gather all the necessary tools and materials. This will ensure a smooth and efficient installation. Here is a list of the essential items you will need:
- A drill with assorted drill bits
- A saw
- A hammer
- A tape measure
- Screws and nails
- Wood glue
- A level
- Protective gear (gloves, goggles, etc.)
Ensure Safety Precautions Are In Place
Prioritizing safety during the installation process is of utmost importance. Here are some key safety precautions to keep in mind:
- Wear protective gear (gloves, goggles, etc.) to prevent injuries.
- Ensure the area surrounding the attic access point is clear of any hazards or obstructions.
- Work on a stable and secure ladder or platform when installing the attic ladder.
- Follow the manufacturer’s instructions carefully to avoid any mishaps.
- Double-check that all screws, bolts, and connections are tightened securely.
Step 1: Assessing The Attic Space
Before you dive into the installation process of an attic ladder, it’s important to assess the attic space first. This step will help you ensure that the area is suitable for installing a ladder and that there are no obstructions or structural issues that could hinder the installation process or the functionality of the ladder.
Clearing The Area Around The Access Point
Clearing the area around the access point is the first task you should tackle when assessing your attic space. Remove any objects or debris that might hinder your ability to install the ladder safely and comfortably.
You want to create a clean and spacious area to work in, allowing for easy movement and access throughout the installation process. By clearing the area, you can minimize the risk of accidents or damage to your property.
Checking For Any Obstructions Or Obstacles
Once you’ve cleared the area, it’s time to check for any obstructions or obstacles that might interfere with the installation of the ladder. Look out for things like electrical wires, ductwork, or pipes that are blocking the path.
If you come across any obstacles, you’ll need to plan ahead on how to work around them or determine if professional assistance is required. It’s crucial to address these issues before proceeding with the installation to ensure a smooth and successful process.
Evaluating The Structural Integrity Of The Ceiling
The structural integrity of your ceiling is another important aspect to assess during the attic ladder installation process. You want to ensure that the ceiling can support the weight of the ladder and any additional weight that may be placed on it during use.
Inspect the ceiling for any signs of damage, such as cracks, water stains, or sagging. If you notice any issues, it’s recommended to consult with a professional to evaluate and address them before moving forward. A stable and secure ceiling is crucial for the safety and longevity of your attic ladder.
Step 2: Choosing The Right Ladder
Now that you have assessed your attic space in Step 1 and determined that an attic ladder is the best solution for accessing it, it’s time to choose the right ladder for your needs.
To make an informed decision, it’s essential to understand the different types of attic ladders available, consider weight capacity and size requirements, and select a ladder with the desired features.
Understanding The Different Types Of Attic Ladders Available
When it comes to choosing an attic ladder, you’ll find various types available on the market. Each type offers its own unique advantages and considerations.
Here are the primary types of attic ladders:
- Folding attic ladders: Folding attic ladders are the most common and popular choice. These ladders are hinged in multiple places, allowing them to fold and unfold smoothly. They are typically made of lightweight materials like aluminum or wood.
- Telescoping attic ladders: Telescoping attic ladders are a space-saving option. These ladders consist of a series of overlapping sections that slide together for compact storage. They are ideal for attics with limited vertical clearance.
- Scissor attic ladders: Scissor attic ladders are known for their stability and ease of use. These ladders have a unique scissor-like mechanism that extends and retracts with minimal effort. They provide a wide stepping area for enhanced safety.
- Electric-powered attic ladders: For maximum convenience, electric-powered attic ladders are an excellent choice. These ladders feature an electric motor that automatically raises and lowers the ladder. They are especially beneficial for individuals with physical limitations.
Considering Weight Capacity And Size Requirements
When selecting an attic ladder, it’s crucial to consider weight capacity and size requirements. The weight capacity of the ladder should comfortably accommodate the heaviest person who will be using it, along with any items they may be carrying.
Additionally, ensure the ladder’s dimensions fit the available space in your attic. Measure the ceiling height, floor-to-ceiling distance, and rough opening size to ensure a proper fit.
Selecting A Ladder With The Desired Features
Your attic ladder should offer features that align with your specific needs and preferences.
Consider the following features when making your selection:
- Insulation: Some attic ladders come with built-in insulation to reduce heat transfer, keeping your home energy-efficient.
- Handrail: A ladder with a sturdy handrail provides added stability and safety during ascent and descent.
- Slip-resistant steps: Look for ladder models that have slip-resistant steps or treads for increased traction and grip.
- Easy installation: Opt for a ladder that comes with clear installation instructions and all the necessary hardware for a hassle-free setup.
- Durability: Choose a ladder made of high-quality materials to ensure its long-lasting performance and durability.
By considering the different types of attic ladders available, weighing weight capacity and size requirements, and selecting a ladder with the desired features, you can confidently choose the right attic ladder that suits your needs and makes accessing your attic easier than ever before.
Step 3: Gathering The Materials And Tools
Step 3 of installing an attic ladder involves gathering the necessary materials and tools. By following these easy steps, you can successfully install an attic ladder by yourself.
Before you start installing an attic ladder by yourself, it’s crucial to gather all the necessary materials and tools. This will ensure a smooth and efficient installation process. Here is a list of materials you will need:
| Materials: | |
| • Attic ladder kit | • Nails or screws |
| • Measuring tape | • Level |
| • Stud finder | • Drill |
| • Saw | • Safety goggles |
| • Masking tape | • Hammer |
| • Insulation | • Caulk |
It’s essential to ensure that all the tools needed for the installation are readily available. Having these tools within arm’s reach will save you time and effort during the installation. Make sure you have:
- Tools:
- • Measuring tape
- • Level
- • Stud finder
- • Drill
- • Saw
- • Safety goggles
- • Masking tape
- • Hammer
- • Caulk gun
While these materials and tools are necessary for the installation, there may be some additional equipment required based on the specifics of your attic and ladder kit. It’s recommended to double-check the instructions provided with your ladder kit for any special requirements. This step is crucial to ensure a hassle-free installation process without any last-minute surprises. Take the time to carefully review the instructions and ensure you have all the necessary equipment.
With all the materials, tools, and additional equipment gathered, you are now ready to move on to the next step of installing your attic ladder.
Step 4: Preparing The Attic Access Point
Now that you’ve prepared the attic ladder and gathered all the necessary tools, it’s time to move on to the actual installation process. This step focuses on preparing the attic access point, ensuring it is secure and ready for your new ladder.
Marking The Center Point Of The Access Opening
Before cutting into your ceiling, it’s crucial to accurately mark the center point of the access opening. This will ensure that your ladder is properly aligned and positioned for optimal functionality. To mark the center point:
- Measure the width of your ladder and divide it by two to find the center.
- Using a measuring tape, measure the distance from the closest wall to the center point and make a small mark.
- Repeat the previous step for the opposite side of the access opening.
- Use a chalk line or laser level to connect the two marks, creating a straight line.
Cutting The Opening In The Ceiling
Once you have marked the center point of the access opening, it’s time to cut into the ceiling. It’s essential to follow these steps carefully to ensure a precise and clean cut:
- Put on your safety goggles and a face mask to protect yourself from debris.
- Using a reciprocating saw or a keyhole saw, carefully cut along the marked line.
- Start the cut by gently penetrating the surface of the ceiling and gradually increase the pressure.
- Ensure that your saw remains perpendicular to the ceiling to create a straight and even cut.
- Continue cutting until you have completed the full outline of the access opening.
Reinforcing The Surrounding Structure If Necessary
Depending on the condition of your ceiling and the surrounding structure, you may need to reinforce it to support the weight of the attic ladder. Here’s how to reinforce the area if necessary:
- Inspect the surrounding ceiling structure for any signs of weakness or damage.
- If you notice any issues, such as sagging or inadequate support, install additional framing or bracing to reinforce the area.
- Consult a professional or a contractor if you are unsure about the structural integrity of the surrounding area.
By properly marking the center point of the access opening, cutting the ceiling accurately, and reinforcing the surrounding structure if needed, you are ready to proceed with the next step of installing your attic ladder. Stay tuned for step 5: Installing the Attic Ladder.
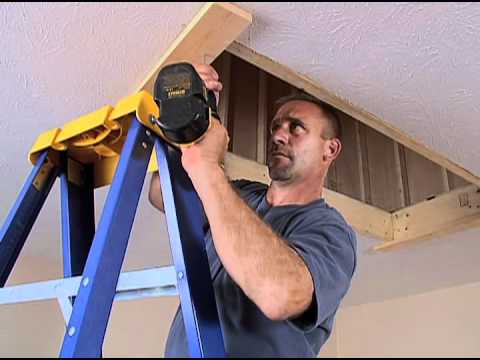
Step 5: Installing The Attic Ladder
Learn how to install an attic ladder on your own with Step 5: Installing the Attic Ladder. This DIY guide provides clear instructions for a successful installation, making it easy to access your attic space.
Assembling The Ladder According To The Manufacturer’s Instructions
Before installing your attic ladder, it’s crucial to assemble it correctly as per the manufacturer’s instructions. Follow these steps:
- Carefully read the manufacturer’s manual to familiarize yourself with the different parts of the ladder.
- Lay out all the components in an open space, ensuring you have all the necessary tools and hardware.
- Start by attaching the ladder sections together using the provided bolts and screws. Double-check the instructions to make sure you’re aligning the ladder sections properly.
- Secure any additional supports or brackets according to the manufacturer’s guidelines. This step is essential for the overall stability and functionality of the ladder.
Once you’ve successfully assembled the ladder, you’re now ready to move on to the next essential steps in the installation process.
Securing The Ladder To The Attic Floor And Joists
To ensure the safety and stability of your attic ladder, it’s vital to securely fasten it to both the attic floor and the joists. Follow these straightforward steps:
- Position the ladder in the desired location, aligning it perpendicular to the floor and parallel to the opening. Make sure the ladder is centered and properly aligned before proceeding.
- Use a measuring tape to ensure equal distance from the edges of the ladder frame to the attic opening on all sides.
- Once you’ve confirmed the alignment, secure the ladder frame to the attic floor using the provided screws or nails. Ensure that the ladder remains level during this step.
- Next, attach the brackets or hangers to the joists above the ladder frame. These brackets will provide extra support and ensure the ladder remains secure and stable over time.
Testing The Ladder For Stability And Functionality
After securing the ladder, it’s crucial to test its stability and functionality before putting it to use. Follow these steps to ensure a safe and reliable attic ladder:
- Carefully climb up and down the ladder, paying attention to any wobbling or instability. Inspect each connection point and attachment to ensure there are no loose or weak areas.
- Check to see if the ladder unfolds and retracts smoothly without any obstructions. Ensure the hinges and locks are working properly.
- Test the ladder’s weight capacity by placing a load equal to your own weight onto the ladder. Ascend and descend a few times while verifying its stability under the load.
- If you notice any issues during the testing phase, double-check the installation steps and consult the manufacturer’s manual for troubleshooting guidance. Address any problems or concerns before regularly using the attic ladder.
By following these steps, you’ll be able to install your attic ladder with confidence, providing convenient access to your attic space while ensuring the safety of you and your loved ones.
Step 6: Ensuring Safety And Security
In step 6 of installing an attic ladder, it is essential to prioritize safety and security. Ensure that the ladder is securely fastened, use proper safety equipment, and take precautionary measures to prevent accidents or injuries during the installation process.
Ensuring safety and security is of utmost importance when installing an attic ladder by yourself. By following these additional steps, you can create a safe and secure environment for using the ladder.
Installing Handrails And Guardrails For Added Safety
Handrails and guardrails are essential accessories to increase safety while using an attic ladder. These provide stability and support, preventing any accidental slips or falls. Here’s how you can install them:
- Measure the length of the attic opening edge where you want to install the handrail.
- Cut the handrail to the measured length, ensuring it fits securely along the edge.
- Using a drill, create pilot holes on the edge of the attic opening.
- Attach the handrail securely using screws or brackets, ensuring it is firmly fixed in place.
- Repeat the same steps for installing the guardrail, making sure it runs parallel to the handrail and is at a suitable height to prevent falls.
With these handrails and guardrails in place, you can confidently use the attic ladder, knowing you have added an extra layer of safety.
Closing And Sealing The Attic Access Opening When Not In Use
When the attic ladder is not in use, it’s crucial to properly close and seal the access opening. This helps maintain insulation, prevent energy loss, and keep pests or unwanted air drafts out. Follow these steps:
- Before closing the attic ladder, ensure that the ladder is securely pulled up and locked.
- Remove any objects or debris near the opening.
- Place an insulation cover or hatch cover on top of the attic access opening, making sure it fits snugly.
- Secure the cover in place using screws or locks, ensuring it cannot be easily removed.
By properly closing and sealing the attic access opening, you can enhance energy efficiency and prevent any potential safety hazards.
Regularly Inspecting And Maintaining The Ladder
Regular inspection and maintenance of the attic ladder are necessary to ensure its continued functionality and safety. Here’s what you should do:
- Inspect the ladder for any signs of wear and tear, such as loose screws or damaged hinges.
- Tighten any loose screws or bolts to ensure stability.
- If any parts are damaged or broken, replace them promptly.
- Check the ladder’s weight capacity to ensure it can still support your weight.
- Regularly lubricate moving parts, such as hinges, to keep them functioning smoothly.
- Test the ladder’s operation periodically, ensuring it opens and closes securely and without any obstructions.
By regularly inspecting and maintaining your attic ladder, you can extend its lifespan and ensure that it remains safe for use.

Credit: www.ahs.com
Frequently Asked Questions Of How To Install An Attic Ladder By Yourself
What Is The Easiest Attic Ladder To Install?
The easiest attic ladder to install is the [Brand Name] attic ladder. It is straightforward to set up and does not require extensive knowledge or experience. Its user-friendly design allows for quick and hassle-free installation.
Can I Install A Loft Ladder Myself?
Yes, you can install a loft ladder yourself. Just make sure to follow the instructions accurately and take safety precautions. It’s a good idea to have someone assist you, and if you’re unsure, consult a professional for advice.
How Long Does It Take To Put In An Attic Ladder?
Attic ladder installation time depends on factors like complexity and experience. Typically, it takes around 4-6 hours for professionals to install an attic ladder. However, this can vary based on your specific circumstances. Hiring experts can ensure a quicker and hassle-free installation process.
How Much Should It Cost To Install An Attic Ladder?
The cost of installing an attic ladder can vary. On average, it can range from $200 to $600 depending on factors like the ladder type, size, and complexity of installation. It’s recommended to get a professional quote for an accurate estimate.
How Do I Choose The Right Attic Ladder For My Home?
Choosing the right attic ladder involves considering factors such as ceiling height, rough opening size, and weight capacity.
What Tools Do I Need To Install An Attic Ladder?
To install an attic ladder, you will typically need a tape measure, drill, saw hammer, level, and safety equipment such as gloves and goggles.
Can I Install An Attic Ladder By Myself, Or Do I Need Professional Help?
With proper guidance and following the manufacturer’s instructions, you can successfully install an attic ladder by yourself.
Final Words
Installing an attic ladder by yourself can be a rewarding project that adds functionality and convenience to your home. With the right tools and knowledge, you can successfully complete the installation in a few simple steps. Remember to prioritize safety throughout the process and seek professional help if needed.
Enjoy easy access to your attic and make the most of the extra storage space it provides. Happy DIYing!